.png)
How to make Macrame Twisted Wristlet // PDF tutorial + Video Tutorial
- Oct 31, 2021
- 3 min read
Updated: Jan 18, 2022
Do you lose your keys in your purse all the time? Or maybe you need an extra set of hands when you’re trying to carry ALL the bags in from the grocery store?
These babies are here to the rescue! Keys will be so much easier to find in that giant tote of yours. It’s not just for keys; you can use them for a clutch (tutorial on its way) or your id/badge, etc.
You can adjust the length and create lanyards as well for your badge, keys, mask and so on.

Macrame Twisted Wrislet DIY Kits 20cm
Buy Now
Macrame Twisted Wristlet 18cm
Buy Now
Material:
1. Macrame Cord (3mm/4mm) x3 pcs
2. D-ring / Lobster claw key chain
3. Glue (Optional)
4. Scissors
5. Clipboard
There are two knots you need to know
1. half square knot
2. Larks Head Knot
Cord Lengths:
90cm x 1 pc
210cm x 2 pcs
This will make a wristlet about 20cm macrame twisted wristlet.
TIP:
Shortest cord (90cm) is the middle cord
Two longest cord (210cm) are the side cord
If you want to make a smaller or shorter wristlet, here are the formula for the 3 pieces of cord.
Shorter cord formula: Wristlet Length x 4.5
For example, you want a 25 cm wristlet, you shortest cord length will be 25cm x 4.5 = 112.5cm.
Longer cord formula: Wristlet Length x 10.5
For example, you want a 25 cm wristlet, you shortest cord length will be 25cm x 10.5 = 262.5m.
Here's the final look of the attachment

Share your work with me on Instagram using hashtag #weaveystudio
Let's make a twisted wristlet
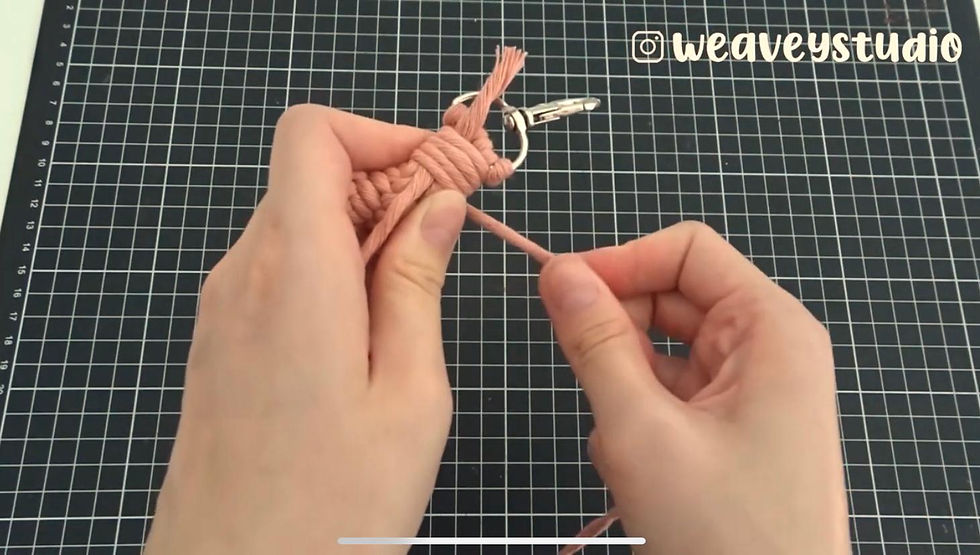
Step 1:
Use the Larks Head Knot to attach the 90cm in the middle to the D-ring. Fold the two longer cords (210cm) to make one 165cm side and one 45 cm side.
Step 2:
Start your half square knots. Make cord 1 as a 4 shape and Cord 6 is on the top

Step3:
Cord 6 has to go under cord 2, 3, 4, 5.

Step 4:
Pull cord ends and tighten.

Step 5:
Repeat this step for the whole wristlet. (If you are not clear from word, you can watch the tutorial from the top.
Step 6:
Twist the wristlet.

Step 7:
Leave 2cm-3cm cord when you cut the remaining cord

Step 8:
Prepared glue and a sealing clip (This step is optional)

Step 9:
Put on some glue and stick them together

Step 10:
Use a sealing clip to clamp it.

Step 11:
After a few minute, take off the sealing clip and do a wrapping knot on it.
Take a 30 cm cord and fold one end with about 6cm of cord with the loop lined up.

Step 12:
Hold the loop cord along with the project with and start project ends and start wrapping with the longer side of the cord. Wrap from top down, leaving a short cord end.
Step 13:
Continue wrapping all the cords together until you get to the loop end. Thread the wrapped cord with into the loop end. Keep the wrapped cord tight!

Step 14:
Pull the cord that is on the top of the project and as you pull, the loop end will get smaller. Pull the wrapped cord end for a clean finish. Hide the knot inside instead of pull it all out.

Step: 15
Cut excess cords.

DIY Kits
Are you stuck in quarantine or self-isolation? Are the kids home on school holidays, bored and driving you batty?!? Well you have come to the right place! You can DIY most of my macrame creations in the comfort of your own home. This DIY kits come with all the supplies required.

Macrame Twisted Wrislet DIY Kits 20cm
Buy Now
This kit is a great inexpensive way to try macramé! You don't have to prepare any materials as we have prepared for you!
Happy Knotting!


Comments